
Plugins extend the functionality of your WordPress site (just like we add new features and functions to a web browser like Google Chrome or Mozilla Firefox) with custom features. WordPress Plugins are independently developed by third-party developers across the world.
There are over 40,000 plugins in the official WordPress Plugin Directory and you can install any of them using the plugin browser or the installer available in your WordPress dashboard.
If you know what you want then you can use the Search to find it. Or, you can browse the Featured, Popular, Recommended, or Favorites (favorite plugins of a particular WordPress.org user) to get an idea of what’s possible.
1. Install & Activate & Configure Essential WordPress Plugins

- Contact Form 7
- Genesis Simple Edits
- Jetpack by WordPress.com
- TinyMCE Advanced
- WordPress Related Posts
- Yoast SEO
There are actually more plugins that are essential or super-useful but the above list is good enough to start with.
2. WordPress Dashboard (Before Customization)
When you activate plugins, you may see extra widgets and boxes and sidebar menus on your WordPress Dashboard. Like this:

3. Customize WordPress Dashboard
The best thing is, you can customize or remove most of the extra boxes so that the screen will look less cluttered.

4. WordPress Dashboard (After Customization)
Here’s the dashboard after customization.

5. Delete Unwanted WordPress Plugins
You can delete unwanted plugins (or the default plugins that comes as part of the WordPress installation).

5.1. Deleted Unwanted WordPress Plugins

6. WordPress Active Plugins
Here’s a list of the currently activate plugins.

7. Deactivate Unwanted Plugins
You can deactivate/delete plugins that you no longer need. Since you have already imported the demo content and widgets, it’s safe to delete/deactivate Widget Importer & Exporter and WordPress Importer.

7.1. Deactivated Unwanted Plugins
And I have deactivated it.

8. Configure Jetpack For WordPress
Jetpack is a super-plugin that brings the power of WordPress.com cloud to your self-hosted WordPress. It’s a must-have with over 30 unique features to turbocharge your blog like Free Content Delivery Network (CDN), Analytics, Social Comment System, Contact Form, Mobile Theme, and a ton of other features.

You need a WordPress.com account to enjoy all the features of this plugin. So login to your WordPress.com account (or create one and login) before entering the Jetpack menu, and click “Connect Jetpack”.
8.1. Connect Jetpack To WordPress.com Account

Click “Approve”.
8.2. Connected Jetpack To WordPress.com Account

Jetpack is a freemium plugin and its “Free” plan is good enough for almost all users.
9. Jetpack Dashboard

That’s your Jetpack Dashboard.
When your WordPress site is fully active and is getting traffic, you will see the stats like:

10. Jetpack Settings
Jetpack Settings let you activate/deactivate different features or add-ons of the Jetpack plugin with just one-click. The features are further categorized into Writing, Sharing, Discussion, Traffic, and Security.
10.1. Jetpack Writing Add-ons

10.2. Jetpack Sharing Add-ons

Once you enable “Sharing buttons”, go to WordPress Dashboard > Settings > Sharing, to configure the same.

10.3. Jetpack Discussion Add-ons

10.4. Jetpack Traffic Add-ons

10.5. Jetpack Security Add-ons

11. Jetpack Site Stats

Site Stats show simple yet comprehensive and easy to understand analytics about your blog. It shows the number of page views (daily, weekly, and monthly), top posts, pages, search queries, traffic referrers, and outgoing clicks of the day right within your WordPress dashboard.
By the way, when your WordPress site is fully active and is getting traffic, you will see the stats like:

12. Genesis Simple Edits

Genesis Simple Edits lets you edit the three most commonly modified areas in any Genesis theme: the post-info, the post-meta, and the footer area.
13. Genesis Simple Share Settings
Genesis Simple Share lets you add social sharing buttons to your WordPress posts and pages.

14. TinyMCE Advanced Editor Settings
TinyMCE Advanced enhances the default WordPress Editor by adding more formatting tools.
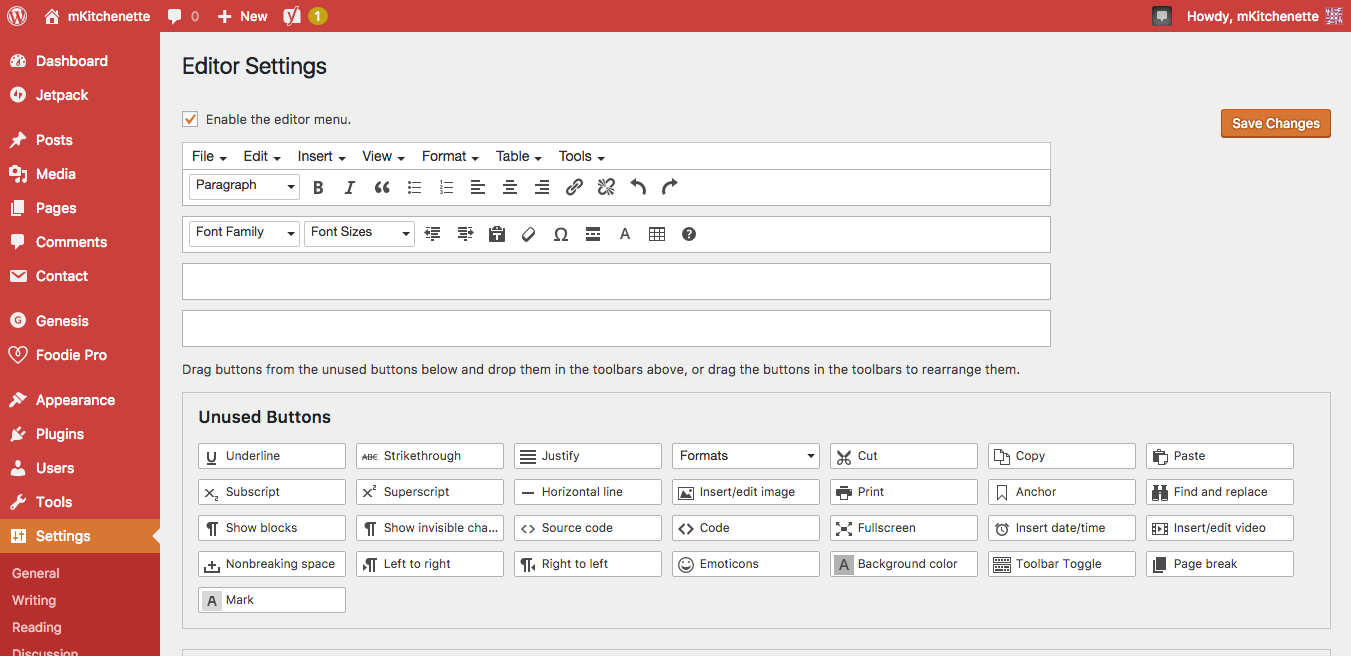
sad
Go to WordPress Dashboard > Settings > TinyMCE Advanced, to customize the same.
15. WordPress Related Posts
WordPress Related Posts shows a list of related posts with optional thumbnails and different styles to your readers.

Go to WordPress Dashboard > Settings > WordPress Related Posts, to customize the same.
16. Contact Form 7
Contact Form 7 is the best contact form plugin for WordPress. It can manage multiple contact forms and you can customize the forms the way you want.

Go to WordPress Dashboard > Contact > Contact Forms, you will see a default contact form titled “Contact form 1” that was automatically generated when you installed Contact Form 7 for the first time. You can customize it so as to make it match your requirements. Hover over it, and click “Edit”. You will go to the “Edit Contact Form” screen with tabs like Form, Mail, Messages, and Additional Settings.
17. Customize Contact Form 7 Form

Use “Form” tab to customize what information has to be collected from your readers.
18. Customize Contact Form 7 Mail

Use “Mail” tab to customize the way user-submitted data is handled. In the above example, all forms submitted by a user will be forwarded to my email address: [email protected].
19. Customize Contact Form 7 Messages

User “Messages” tab to customize the acknowledgement (a user sees when they submit a form).
20. Create Contact Page (Or Customize Existing Contact Form Page)

There’s already a “Contact Page” (included in the theme demo content), so instead of creating a new Page, I’m just editing it.
21. Add Contact Form 7 Shortcode

I have edited the title of the page from Contact Page to just Contact and added the shortcode (generated by Contact Form 7) to insert the Contact form.
22. Added Contact Form 7 Shortcode

Now that I have added the contact form shortcode and updated the page.
23. Preview mKitchenette Contact Page
Here’s a preview of the contact form on mKitchenette.

24. Contact Form 7 Email
And here is its notification or the form data, that I have received via email (when I clicked “Send” with sample input).

How To Start A Food Blog — Step-by-Step Tutorials
- How To — Start A Food Blog — Buy A Domain Name & Web Hosting
- How To — Start A Food Blog — Install WordPress
- How To — Start A Food Blog — Install A WordPress Theme
- How To — Start A Food Blog — Import WordPress Demo Content And Install & Configure Necessary WordPress Plugins
- How To — Start A Food Blog — Change WordPress Profile & Settings
- How To — Start A Food Blog — Install & Configure Essential WordPress Plugins
- How To — Start A Food Blog — Customize WordPress
- How To — Start A Food Blog — Setup Essential Blogging Tools
- How To Start A Food Blog (A Delicious Handbook)